Celebrate love in style with these gorgeous romantic nail designs. Whether you’re head over heels for a special someone or simply want to treat yourself, your talons are sure to set pulses racing with one of these ideas.
From hearts and kisses to Cupid’s arrows, you’re sure to hit the target.

Heart Beat
Make hearts race with this clever design.
Supplies
- Light gray nail polish
- Clear nail polish with holographic glitter
- Black nail polish
- Thin nail art brush or detailing pen
Steps
Paint your nails with two coats of light gray polish and allow to dry.
Next add a layer of the clear glitter polish for a sparkly effect. Use a thin nail art brush or detailing pen to carefully draw zigzag lines on two nails.
Taper off the ends for a realistic look. On one nail, use a small brush to draw a solid black heart .
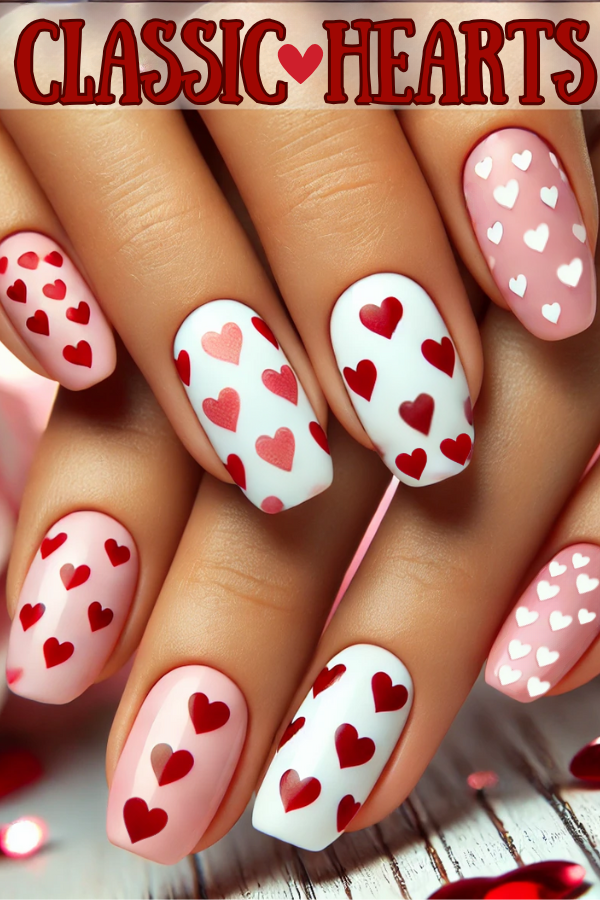
Classic Hearts
Nothing says Valentine’s Day like adorable hearts. Here’s how to achieve this look:
Supplies
- Red and white nail polish
- A thin nail art brush or dotting tool
Steps
- Apply a base coat to protect your nails.
- Paint your nails a soft pink or white.
- Use the dotting tool to create two small dots close to each other.
- Drag the dots downward to form a heart shape.
- Seal with a top coat for a glossy finish.
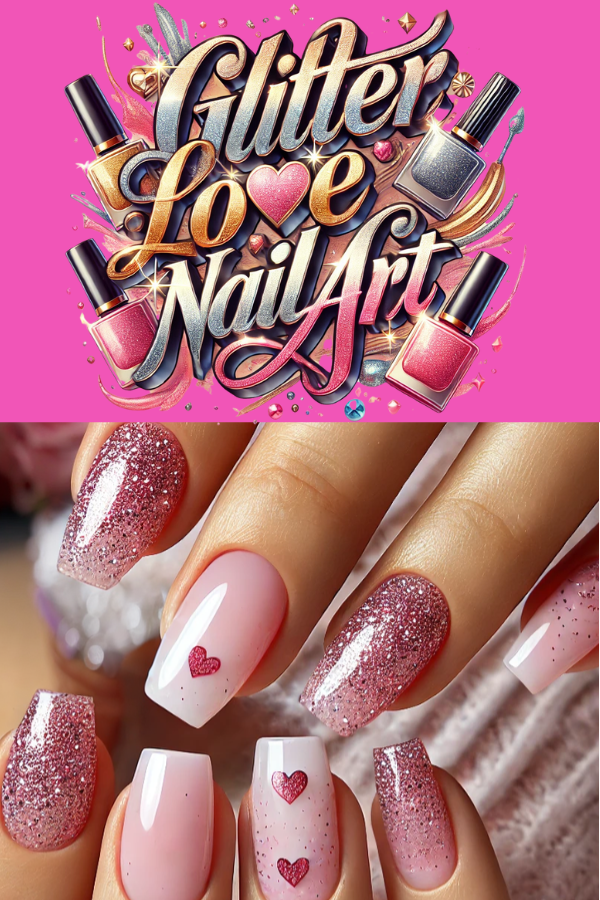
Glitter Love
For those who love a little sparkle, glitter nails are always a win.
Supplies
- Pink glitter nail polish
- Clear base and top coat
Steps:
- Start with a clear or pale pink base coat.
- Add a layer of pink glitter polish, focusing more on the tips for an ombré effect.
- Apply a top coat to smooth out the texture.
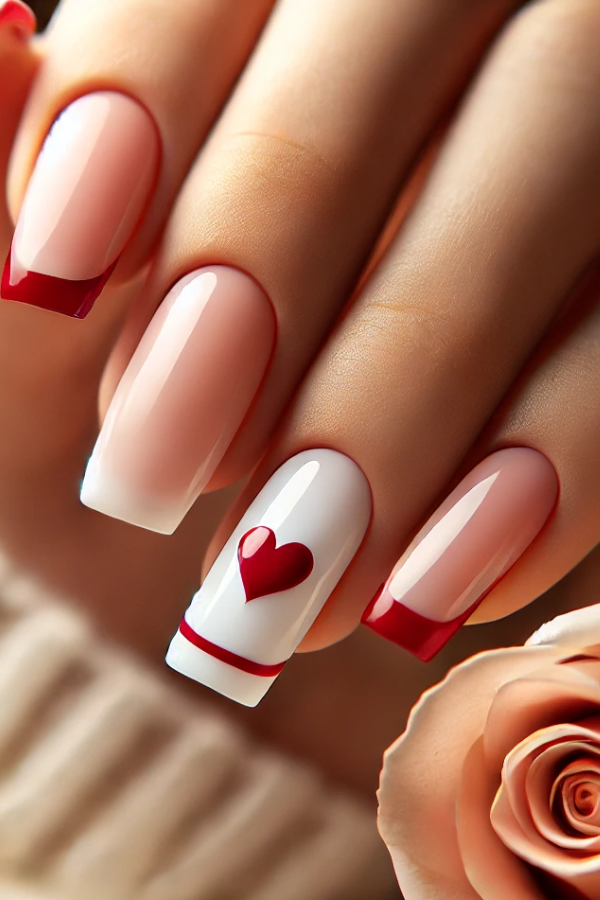
French Tip with a Twist
Add a Valentine’s flair to a classic French manicure.
Supplies
- White nail polish
- Red or pink nail polish
- Nail art tape
Steps
- Apply a neutral or sheer base color.
- Use nail tape to section off the tips.
- Paint the tips red or pink instead of white for a romantic twist.
- Add a heart accent on one or two nails for extra charm.
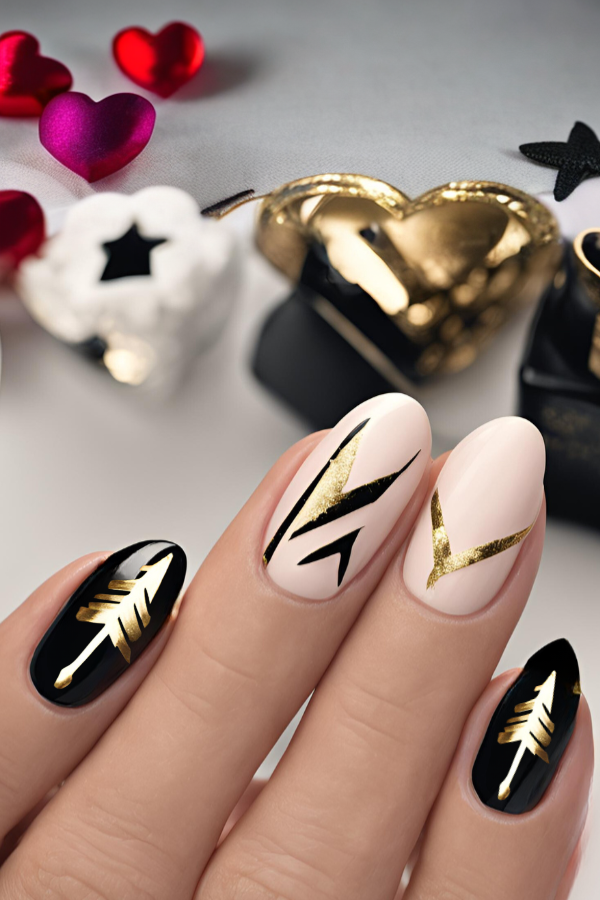
Cupid’s Arrows
Channel the love-struck theme with cupid’s arrows.
Supplies:
- Black ,gold and pink nail polish
- A nail art pen or thin brush
- Nail decals or stencils (optional for arrows and geometric designs)
Steps:
- Paint your nails with black and pink polish in an alternating pattern.
Use two thin coats and let each one dry before painting the next. - Use a thin brush or stencil to make precise arrow shapes on the black nails with gold foil or metallic polish.
- Create geometric designs on the pink nails with a thin brush
- Once the gold details are dry, put on a clear top coat to seal in the design and make your nails shiny.